
CHIP-8 Emulator
13 Aug 2014I mentioned before in my HTML5 Pokémon Save File Reader post that I got into emulation and wanted to create a Game Boy emulator but decided to start smaller. So after creating the save file viewer and doing a lot of university work in between I decided to take another crack at creating an emulator. This time I did some more research on what would be a good platform to start emulating and found that a lot of people recommend that a CHIP-8 emulator is a good starting project for someone wanting to get into the world of emulation.
What’s an emulator?
First off before I begin I should probably give a quick explanation on what an emulator actually is, at least how I understand it:
An emulator is a computer program designed to duplicate the implementation and inner workings of another system, be it a games console, mobile phone, calculator or the guidance system to a certain famous space craft. Now this also may sound a bit like a simulator, in that both an emulator and simulator should come out with the same result as the original system would, and it seems that there isn’t really a clear-cut agreement on the differences between the two, for my purposes I will be using the term emulator here, and for the sake of simplicity will be agreeing with this definition from stackoverflow.
So in the example of a games console, say the Game Boy, an emulator would model the inner workings of the consoles processor, display, sound and input as best it can.
Because of the low-level nature of emulation, it’s very important to make sure you understand how a computer actually works at a low-level, luckily this is covered in most college/university courses early on, and at the core you only really need to understand the fetch-decode-execute cycle to get started in emulation.
What’s CHIP-8?
CHIP-8 was never really an actual physical system, it’s more of a sort of virtual machine than anything else. Basically it was developed as a way of letting people easily create games for the computers at the time (1970s/1980s) and first appeared on the COSMAC VIP. It is however very well suited to emulation as it has a very small amount of opcodes (36) and doesn’t have any added complexity like interrupts, V-Blanks and sound that the NES and Game Boy have and still works like a physical system to the point were it even piggybacked off of some of the opcodes from the COSMAC.
A great article I used when building my emulator can be found here by Laurence Miller (seriously it’s great!), that explains what CHIP-8 is a bit better than me and will help a lot if you want to create your own CHIP-8 emulator.
CHIP-8 Specification
As far as simple specifications go CHIP-8 really is quite a simple system, in brief:
CHIP-8 is capable of addressing 4KB of memory, making it very lightweight on modern systems, has 16 8 bit general purpose registers, one 16 bit register (for storing addresses) and 2 timer registers (one for sound and one as a general timer). It also has a stack pointer register and stack that has a maximum size of 16, and a program counter register, unlike the other mentioned registers these are hidden from CHIP-8 programs.
It’s input is a little esoteric; it uses a 16-key hexadecimal keypad, that is,
a keyboard with the numbers 0 to 9 and letters A to F on it.
The layout is pretty simple:
| 1 | 2 | 3 | C |
| 4 | 5 | 6 | D |
| 7 | 8 | 9 | E |
| A | 0 | B | F |
It’s display is monochrome 64 x 32 pixels in size with the origin (0,0) in the top left hand corner.
CHIP-8 uses sprites to draw to the screen. A CHIP-8 sprite is a group of bytes which are a binary representation of the desired image. Each sprite is 8 pixels wide (as each bit in a byte is used) and can be up to 15 pixels in height. CHIP-8 has its own simple font sprites representing the hexadecimal digits 0 to F stored in its memory. These sprites are XORed onto the existing graphics data.
The timer registers I mentioned before hand decrement at 60hz when they are non-zero, with the CHIP-8s buzzer sounding when the sound register is greater than 0. Many emulators use this as the general clock speed the CHIP-8 system should run at.
For a really good reference/specification on CHIP-8 and it’s opcodes I recommend having a read of Cowgod’s CHIP-8 Technical reference. When creating my emulator I printed out a copy to refer to.
My CHIP-8 Emulator
With all that introduction out-of-the-way I can now talk about my emulator.
I opted to program it in C++ as I am very familiar with it and other languages I use such as Java and JavaScript don’t have the best support for unsigned bytes which would make working at such a low-level a little bit more tedious. I chose to use the SFML library for graphical output and key based input, purely because I am more familiar with its API than SDL, I may in future port my emulator to use SDL however, as SFML doesn’t seem to be used as much as SDL in professional programming.
Writing the emulator wasn’t too difficult a task, just very iterative at times. Because of the simplicity of the CHIP-8 architecture and small amount of opcodes I used a large switch statement as the heart of the fetch-decode-execute cycle, if I were to create another emulator I’d likely use jump tables/function pointers to neaten up the code and make it easier to understand as some other systems generally emulated often have much larger amounts of opcodes, for example the Z80 uses 252 opcodes.
Loading ROM data into memory was done using C++ file steams, and was relatively easy to accomplish. I made sure to put in check for the ROM size so that it didn’t overflow the memory of the emulator.
Key presses were easy to implement as a simple boolean array that have their state set by whatever input library is being used allowing me to divorce the core emulator code from the input library.
void Chip8::setKeyState(unsigned int key, bool state) {
	this->key[key] = state;
}
Because modern keyboards don’t have a hexadecimal pad built in I remapped the keys to:
| 1 | 2 | 3 | 4 |
| Q | W | E | R |
| A | S | D | F |
| Z | X | C | V |
Screen data was treated similarly to the key press data and was accessed as a byte array and passed to whatever library would do the displaying (SFML in this case).
const unsigned char * Chip8::getGraphics() {
	return gfx;
}
I implemented a few testing features into my emulator, including a step mode, fast forward mode (which uncapped the execution rate) and a debug output mode which would log to console what the output should look like (to make sure there were no differences between the screen output and actual output).
A Small Bug
At one point I ran into a problem where an opcode was not working correctly, I spent an hour or two on it until realising my order of operations was wrong for the set of specific bitwise operations it performed (having not done much bitwise stuff since my first year at university this eluded me for a while).
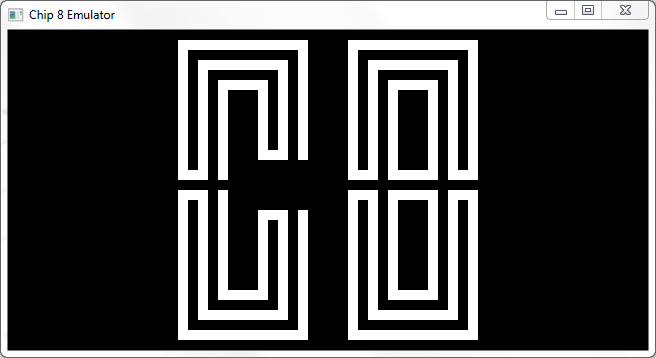
The problem was difficult to pin down as the display appeared to work correctly up to a point and then garbled some sprites as seen below for a Space Invaders clone:
The opcode that was causing the problem in question was quite an important one, 8xy0, a load opcode that loads one register with the value of another.
The offending code looked like this:
V[(opcode & 0x0F00) >> 8] = V[(opcode & 0x00F0 >> 4)];
Which is quite a hard to spot error when scrolling through the opcodes. What is wrong here is that the brackets in the right hand value should be in the same positions as the left otherwise I am performing the left shift operation before the bitwise AND operation (see here for details on order of operations in C++). Altering the code so that it looks like this:
V[(opcode & 0x0F00) >> 8] = V[(opcode & 0x00F0) >> 4];
Solved the issue I was having and made my CHIP-8 Emulator fully operational!
The Finished Product
You can see the finished source code to my emulator on Github.
As mentioned previously future enhancements may include switching to SDL from SFML, but I’d also like to add support for SCHIP, CHIP-48 and SCHIP-8 opcodes which extend CHIP-8 to support a larger resolution among other things.
Overall I had a lot of fun creating the CHIP-8 emulator and learnt a lot about emulation in the process, it also helped me brush up on my bitwise operations.
Useful Links
I’ve scattered some useful links throughout this post but I thought I’d add this section to keep them all together and to add more if needed.
- http://www.multigesture.net/articles/how-to-write-an-emulator-chip-8-interpreter/ is Laurence Miller’s brilliant article on writing a CHIP-8 emulator, I highly suggest reading through it if you want to make your own. He makes one or two small mistakes (such as how the sound works) but has a great working emulator source code which I referred to when I got stuck in places (especially the bug I mentioned).
- http://devernay.free.fr/hacks/chip8/C8TECH10.HTM Cowgod’s Technical Reference, one of the must have resources I used when developing my emulator, it explains all the opcodes plainly as well as the specifics of CHIP-8
- http://www.multigesture.net/wp-content/uploads/mirror/zenogais/FunctionPointers.htm another article from Laurence Miller’s site (originally by someone else) explaining how to use arrays of function pointers to neaten up the code of an emulator.
- http://www.chip8.com/ is a website containing some information on the CHIP-8 as well as a lot of the original programs built for it that I used while testing.
- http://www.emutalk.net/threads/19894-Chip-8/ A mother lode of information on emulating CHIP-8 can be found in this forum thread, the forum itself is brilliant for all thing emulation as well so I’d recommend browsing it.

Comments
Date: October 21th, 2014 19:32
How do you know the VY has to be shifted 8 bits to the right and the VX has to be shifted 4 bits to the right? This is really driving me crazy because I fail to see the logic behind this.
Date: October 22th, 2014 21:24
If you’re referring to the problem piece of code I had; it’s because of how the instruction is set out and bitwise operators:
opcode & 0x0F00refers to the second nibble of the instruction which is the register we want to place the value of the register referred to byopcode & 0x00F0in.An example using the opcode in question (8xy0):
Say we have the instruction
0x8210, that’s1000 0010 0001 0000in binary, and simply means store the value of register 1 in register 2. To get from the instruction the register we want to put the data into we need to isolate the second nibble and shift it so it doesn’t have any of the other bits from the other nibbles.To do that we first bitwise AND it with
0x0F00which results in0x0200(with the 2 being the only nibble that isn’t changed by this operation) which is0000 0010 0000 0000in binary and then shift it by 8 bits to theright so it removes the other bits and becomes0000 0000 0000 0010, 2.You do the same for the next part of the instruction except that it is one place to the right in hexadecimal already which means you shift it by 4 less.
Hopefully that’s explained it well enough for you.